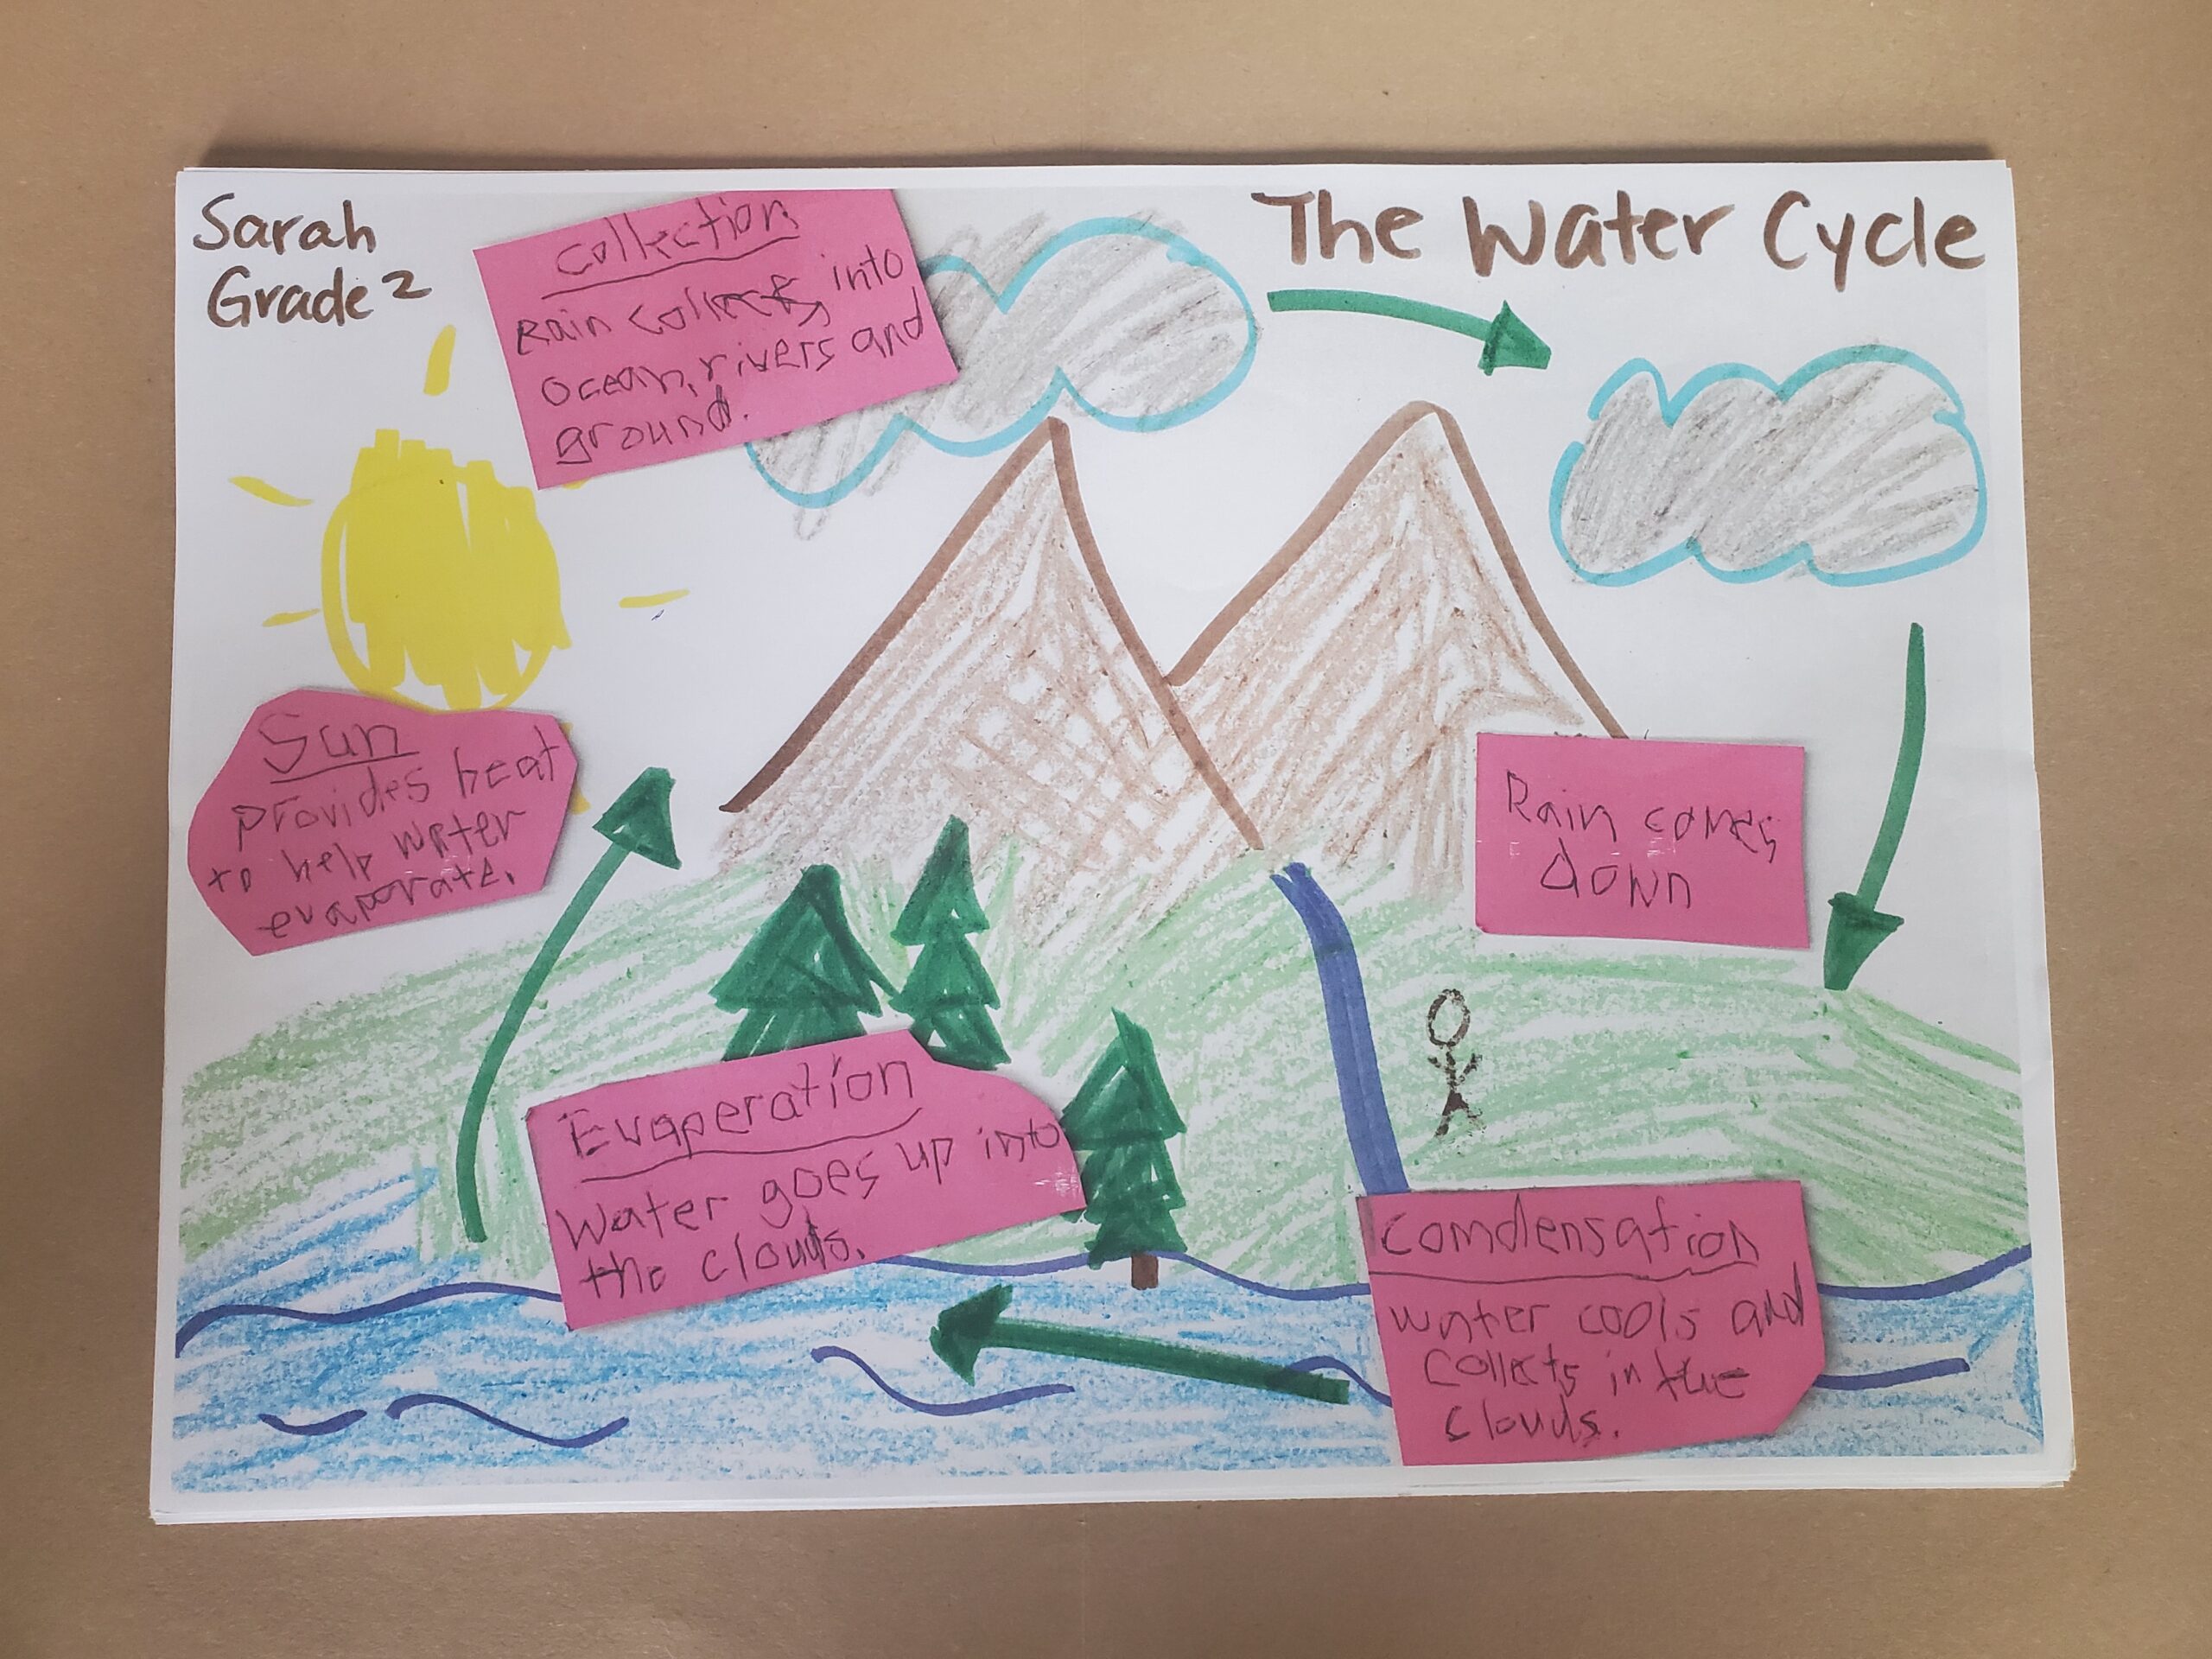
So your students created these beautiful posters, display boards or brochures. Now, you need to give them a grade. How do you make sure you are grading students projects fairly? Often times teachers have their own bias or opinion about what they think is most important on a project. I have found that the fairest, simplest way for teachers to grade projects is to use detailed rubrics. Let’s consider the project in the picture above.
This is a student project about the water cycle. If I was to sit down and give this project a grade I might judge based on how creative the student’s work is along with the accuracy of the descriptions. Other teachers might grade based on spelling, punctuation and neatness. If students in an entire grade are all doing the same project things can get extra tricky. One teacher might give a project 17/20 where as another teacher might give a “lesser” complete project 20/20.
What is a rubric?
A rubric is a type of scoring guide that assesses and describes specific components and expectations for an assignment.
With rubrics you can:
save time grading,
ensure all students are graded consistently,
provide detailed feedback to students,
and even raise quality of students’ work by clearly outlining the expectations.
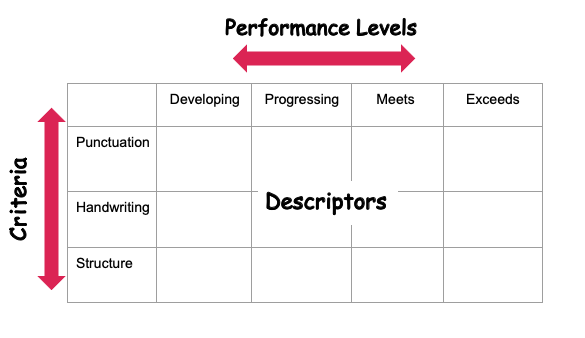
Parts of a Rubric:
1.Performance Levels. At the top, rubrics usually mention 3-4 performance levels. These are the marks/grades students will get for each category. You can use words such as “developing”, “progressing”, “meets”. Some teachers also use numbers 1-4. If you teach preschool or kindergarten you may consider using smiles like the one below from MrsWillsKindergarten.

2. Criteria. The criteria go down the left-hand side of the rubric. I recommend choosing 3-6 different criteria or aspects of the project that you will be focusing your grading on. Make sure that these criteria are things you have taught and focused on in class beforehand. For example, if you never focus on or teach punctuation in your class don’t include that as a grading criteria on the project. If you spent that last couple of weeks teaching your class all about capitalizing names of people and places then you probably would want to include that as a grading criteria if it is relevant to your assignment. Make sure the criteria are narrow enough to be able to give a clear description of them.
General criteria you could use in almost any rubric would be: punctuation, spelling, handwriting, neatness, incorporating pictures and color.
Your criteria should also include elements of your assignment. If you assigned students to draw a picture of a skeleton and label 5 bones. Then one of your criteria needs to be “labeling bones”. If you assigned students to create a brochure about a famous landmark and include a picture of the landmark then one of your criteria would be “Picture of landmark”.
3. Descriptors. After listing your performance levels and criteria all the boxes in the middle of the rubric will now be filled with descriptors. These are sentences that describe what you are looking for in each criteria for each performance level.
When writing descriptors, take out vague and opinion-based words such as “beautiful”, “well”, “poor” etc. Instead use numbers or very clear words.
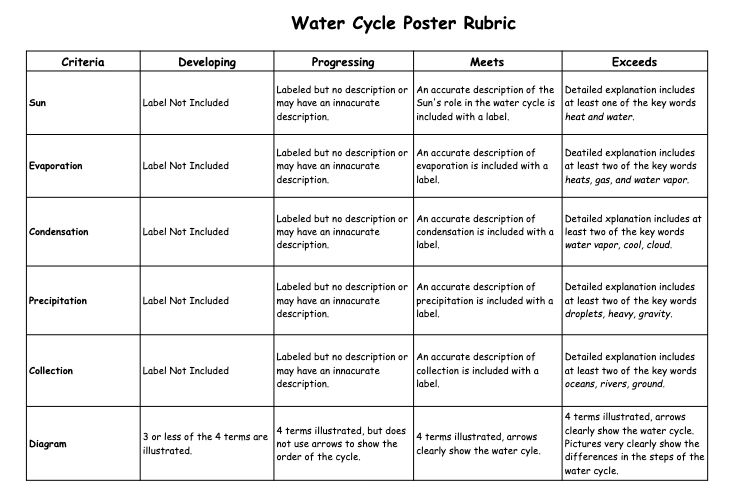
Start by writing the “meets” section descriptors. Here is where you describe what you hope students will do in the assignment. Next, take one thing away to describe the “progressing” level. Then take several things away to describe the “developing” level. For “exceeds” describe how students might go above and beyond your expectations in the project.

Here is an example of a rubric for the water cycle project I described above. It includes clear, detailed descriptors for each performance level. The criteria include each part of the water cycle.

Rubrics can be difficult to create at first but as you practice you’ll find they are really easy to create and grade. Check out this simple checklist that can guide you as you are creating your rubric.
Other posts you might enjoy:


